Thursday, 12 May 2016

Week  14 ( FYP 2)

TitlePresentation day for FYP2.

CONTENT :

For the presentation day, with the poster that been pinned behind the booth and the wireless pigeonhole that placed on the table, the presentation and accessing process run smoothly.

The accessor for the Development Of Wireless Pigeonhole Using Microvontroller:  
  1. MDM NORHASLINAWATI RAMLI
  2. SIR KAMALULFAIZIN MOHD SUHUT


Session Photography with Mdm Azliza Arshad ( supervisor )


Another Session photography with the project and other Candidate 


Week  13 ( FYP 2)

Title Designing the poster for the presentation day.
            Renovating  the wirelesss pigeonhole.

OBJECTIVES :
  1. To make the wireless pigeonhole more understandable.
  2. To design the poster to be both eye-catching and informative.
  3. To create a scene that fits the environment of  the presentation day.


Format for the poster :


The poster contains :
  1. Title, Student Name and Course.
  2. Objective
  3. Product Description
  4. Methodology
  5. Flowchart
  6. Result
  7. Conclusion
  8. Reference 


Image Of Poster Project 


Renovating  process of Wirelesss Pigeonhole :


Labelling Process : 


Sunday, 8 May 2016

Week  12 ( FYP 2)

TitleRunning the component while implementing the coding.

OBJECTIVES :

Connecting the Arduino Nano with :

                             1)  IR sensor.


                            2)  Bluetooth devices.


                           3)  Usb cabel.


                           4)  Lcd 


Video on how the my wireless pigeon hole running when supply inserted :


Week  11 ( FYP 2)

TitleProgress on hardware.

OBJECTIVES :

1) Drilling the hole to insert the paper (assignment).


2) Smoothen the surface that been drilled.


Cutting and Drilling process :


Smoothen process :


Week  10 ( FYP 2)

Title Second briefing for FYP2 student .

OBJECTIVES :

1)  Explaination about the Poster.

2)  Explaination about the Thesis for FYP2.

Briefing content :
Lecturer exposing to the student about the poster and thesis :

1)  Explaining about the format for poster and thesis.
2)  Englightend about what will occur during the presentation day.


Week  9 ( FYP 2)

Title :  Testing the coding for Arduino Nano  ( Counter )

OBJECTIVES :

1)  Testing the coding counter.
2)  Verifying the coding for the counter


Testing and understand the coding for the counter :


After compiling :


CONCLUSION:

The coding for the counter is succesfull.


Week  8( FYP 2)

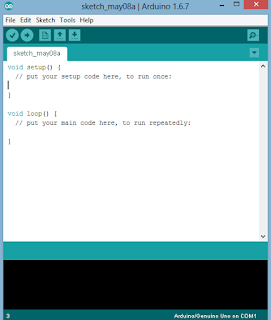
Title :  Understand on how using the arduino software for Ardunio Nano

OBJECTIVES :

  1)  Downloading arduino software.
  2)  installing the arduino software.


Downloading the arduino 16.7 :


Installing the arduino software :


Tuesday, 3 May 2016

Week 7 ( FYP 2)

Title Changing Arduino Uno to Arduino Nano

OBJECTIVES :

Why uses of Arduino Nano are more compatable than Arduino Uno for this project?

·        Because this project have just a few outputs.
·         More cheaper than Arduino Nano.
.         less complicated


Images of Arduino Nano :


Specifications:

Microcontroller                                  Atmel ATmega168 or ATmega328
Operating Voltage (logic level)           5 V
Input Voltage (recommended)            7-12 V
Input Voltage (limits)                          6-20 V
Digital I/O Pins                                  14 (of which 6 provide PWM output)
Analog Input Pins                               8
DC Current per I/O Pin                     40 mA
Flash Memory 16 KB (ATmega168) or 32 KB (ATmega328) of which 2 KB used by bootloader
SRAM 1 KB (ATmega168) or 2 KB (ATmega328)
EEPROM                                          512 bytes (ATmega168) or 1 KB (ATmega328)
Clock Speed                                      16 MHz
Dimensions                                       0.73" x 1.70"
Length                                               45 mm
Width                                                18 mm

Weigth                                               5 g